smartdroid: 2017

Saturday, 30 December 2017

Guide | Creating a Simple Dynamic Web Sites with PHP and MySQL.

Guide | Creating a Simple Dynamic Web Sites with PHP and MySQL.

Creating Dynamic Website With PHP and MySQL. In this guide, you can learn how to create a simple dynamic website using PHP and MYSQL. The web created here is very simple because of learning purpose. By creating a dynamic website users and servers can interact in a complex way. By using the browser, the user can change a certain page. The requests from users will be processed by the server so as to display a different information in accordance with the flow of the program. Generally, dynamic web pages have different databases. In the dynamic web, there are a varies data and information depending on the input of each client. As well as documents that can be read by the client will be different from the documents stored on the server.

Prerequisite.

  1. Download and install XAMPP on your PC. why we use XAMPP? Because XAMPP creates a reliable source to set up the right environment for PHP programming in a fast way.
  2. Download and install Notepad ++, we will use Notepad++ to create and write PHP code. Here

Guide to Creating Dynamic Web Site.

  1. Once XAMPP web server is already installed, now launch the XAMPP control panel.
  2. Then, Start the MySql Module from the current window.
    xampp control panel
    XAMPP control panel
  3. Type localhost at the browser address bar to check that XAMPP working on your machine.
  4. If Xampp is already running, continue to create a PHP file.
  5. Create a new project on localhost, create a folder and rename it to dynamic_php at the following folder.
    • C:/xampp/htdocs/dynamic_php
  6. Now, create or type the PHP code below in Notepad ++. Save it with the name index.php
  7. <!DOCTYPE html>
    <html>
    <head>
    <title>creating dynamic website | Guidebelajar.blogspot.com</title>
    <!-- menghubungkan dengan file css -->
    <link rel="stylesheet" type="text/css" href="style.css">
    <!-- menghubungkan dengan file jquery -->
    <script type="text/javascript" src="jquery.js"></script>
    </head>
    <body>
    <!--
    Author : asyraf_singh
    Site : guidebelajar.blogspsot.com
    -->
    <div class="content">
    <header>
    <h1 class="judul">Asyraf_singh</h1>
    <h3 class="deskripsi">Creating A Dynamic Website with PHP & MySql</h3>
    </header>

    <div class="menu">
    <ul>
    <li><a href="index.php?page=home">HOME</a></li>
    <li><a href="index.php?page=tentang">About</a></li>
    <li><a href="index.php?page=data">Data</a></li>
    </ul>
    </div>

    <div class="badan">


    <?php
    if(isset($_GET['page'])){
    $page = $_GET['page'];

    switch ($page) {
    case 'home':
    include "pages/home.php";
    break;
    case 'tentang':
    include "pages/about.php";
    break;
    case 'data':
    include "pages/data.php";
    break;
    default:
    echo "<center><h3>Sory .. pages not found !</h3></center>";
    break;
    }
    }else{
    include "pages/home.php";
    }

    ?>

    </div>
    </div>
    </body>
    </html>
  8. To make your dynamic web page look more interesting, please create the following css file on your Notepad ++ and then save it with name style.css
  9. body{
    background-color:#d3dce3;
    font-size:16px
    color:#444;
    font-family: aqua;
    }

    .content{
    width: 65%;
    margin: 10px auto;
    }

    /*header*/
    header{
    background-color: #83b2d6;
    padding: 20px 10px;
    border-radius: 5px;
    border: 1px solid #f0f0f0;
    margin-bottom: 10px;
    }

    header h1.judul,
    header h3.deskripsi{
    text-align: center;
    }

    /*menu navigasi*/
    .menu{
    background-color: #2685cc;
    border: 1px solid #f0f0f0;
    border-radius: 8px;
    margin-bottom: 10px;
    }

    div.menu ul {
    list-style:none;
    overflow: hidden;
    }


    div.menu ul li {
    float:left;
    text-transform:uppercase;
    }

    div.menu ul li a {
    display:block;
    padding:0 20px;
    text-decoration:none;
    color:#01f2f9;
    font-family: sans-serif;
    font-size:13px;
    font-weight:400;
    transition:all 0.3s ease-in-out;
    }

    div.menu ul li a:hover,
    div.menu ul li a.hoverover {
    cursor: pointer;
    color:#fff;
    }


    div.badan{
    background-color: #d9ddee;
    border-radius: 5px;
    border: 1px solid #f0f0f0;
    margin-bottom: 10px;
    }

    div.halaman{
    text-align: center;
    padding: 30px 20px;
    }
  10. At this step, you have successfully created a simple dynamic website template.
  11. Then, go to C:/xampp/htdocs/dynamic_php and create a folder, rename this folder with pages.
    creating dynamic website
    creating a dynamic website
  12. Then, we will create some PHP pages that are placed in the pages folder.
  13. Here is the page that we will create.
    • home
    • about
    • data
  14. Now, create or type the following PHP code on Notepad ++ to create home.php
  15. <div class="pages">
    <h2>Home</h2>
    <p>Wellcome to my website</p>
    </div>
  16. Then, create about.php
  17. <div class="pages">
    <h2>About Us</h2>
    <p>This is About Us page</p>
    <p>this is my personal dynamic web pages</p>
    </div>
  18. Now, create or write the following PHP code to create data.php
  19. <div class="pages">
    <h2>Data Page</h2>
    <p>Hello.. this is the data page</p>
    </div>
  20. Now test your page, it's work or not. Type the following URL at the browser address bar.
    • http://localhost/dynamic_php/
  21. If successful, you will see the web page as shown in the picture below.
    creating dynamic website
    creating a dynamic website

Wednesday, 27 December 2017

Guide | How to Root LG V30 (H930 for Europe) & Flash TWRP recovery.

Guide | How to Root LG V30 (H930 for Europe) & Flash TWRP recovery.

Root LG V30. Now you can root your LG V30 using this method. So, if you need any information about guide on how to root your LG V30, you can follow this guide. Before rooting you have to flash TWRP recovery on your phone. If you are a beginner in terms of recovery, now we will explain about TWRP recovery. TWRP or TeamWin Recovery Project is a special custom recovery for Android phones. This recovery offers a complete of features that the stock recovery doesn’t. Even, you can back up or restore firmware, flash the phones with third-party software/ROMs, or wipe the partition. Including flashing a zip file to rooting LG V30 phone.

This is not an official recovery, the following TWRP recovery is designed for LG V30 and has been brought by jcadduono as an XDA Recognized Developer. This recovery works on the LG v30, but not completely tested. Here is the list of confirmed working features (OTG storage, MTP, ADB, Flashable zip installer, Mass Storage mode, Nandroid Backup and Restore, Brightness)

The following guide given here are very tricky and may cause your LG V30 phone to become unstable. So, if you understand what you are doing, may you can continue to proceed to root your device.

Take a note, the following guide and the TWRP recovery which is on the download link below are only meant for the Europe (H930) and Italy (H930G) variants of the V30. Make sure to check your device model, and don't attempt to install it on any other model.
Root and TWRP LG V30

Prerequisite.

  1. You need to unlock the LG V30 phone’s bootloader using the official method.
  2. Then download TWRP recovery (twrp-3.1.1-0-h930-by-jcadduono.img) Here 
    • Copy the TWRP file to the extracted Android SDK tools folder.
    • Rename it to twrp-v30.img
  3. Download DM-verity check disabler (no-verity-opt-encrypt-6.0.zip) Here
    • Copy this file to the SD card root directory.
  4. Enable USB debugging.
  5. Download and Install LG V30 drivers on your PC. Here
  6. Download ADB and fastboot installer or Android SDK tools Here
  7. Before proceeding ahead, we highly recommend taking a full backup of your LG device.

Flashing TWRP recovery LG V30 Guide.

  1. Extract all Android SDK tools zip file at C:\adb.
  2. Now, go to the folder where the files are present (Example: C:\adb).
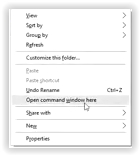
  3. Then, On an empty space inside this folder, press and hold the SHIFT button and right-click. Select “Open command window here” or “Open PowerShell window here” from the menu that appears.
    open command window here
    open command window here
  4. Enable OEM Unlock and USB Debugging on your LG V30 now if it’s not done already.
  5. Then, plug the LG V30 to the PC using the original USB cable. Then type the following command at the command prompt. (make sure USB Debugging is enabled)
    • adb devices
  6. Then, the command shall return an LG V30 device ID.
  7. Now, reboot your V30 into fastboot mode. How to reboot LG V30 into fastboot or bootloader mode? You can type the following command to boot your device into bootloader mode.
    • adb reboot bootloader
  8. Once your LG V30 enters bootloader mode, install TWRP recovery on LG V30 using the following command:
    • fastboot flash recovery twrp-v30.img
  9. Once the flashing TWRP process is done, you need to reboot your LG V30 into TWRP recovery.
  10. If we boot into Android OS, then the system will automatically remove TWRP, so let’s boot into TWRP from here. For this:
    • Press and hold both Volumes down first, and then also press and hold the Power button. 
    • When you see LG logo on screen, quick release for one second and re-hold the Power button 
    • While do not release the Volume down button at all. A Factory Data reset screen will appear, 
    • Now release both Power and Volume down buttons. 
    • Now, boot into TWRP, and for that — it’s weird — do a factory reset here using the instructions on the screen. (Select Yes two times.) This will not reset your device actually, but this will boot your device into TWRP recovery, and TWRP will ignore the reset request. Our job was to boot into TWRP, and this Factory Reset trick gets us that.
  11. Swipe at the bottom to allow for modifications and get to TWRP home screen.
  12. Then, install the DM-verity check disabler file to disable the DM-verity check by Android OS, and safely boot your device without issues.
  13. To do this, you need to tap install button from the TWRP main menu.
  14. In the end, you need to select Reboot system option to restart the device on Android OS. Done

Root Instruction.

Once TWRP successfully installed, now we can root LG V30 using Magisk or SuperSU.

Root LG V30 with SuperSU.

  1. Download the latest SuperSu from Here | or download magisk from Here
  2. Then, copy SuperSu to the internal memory root directory.
  3. Now, boot your LG V30 device into TWRP recovery. How to boot LG V30 into TWRP recovery?
    • Press & hold Volume down + Power button.
    • Release power button for a second when the LG logo comes up on the screen.
    • Then you will see factory reset menu.
    • From here, select ‘Yes’ two times, and you will boot into TWRP.
  4. Then, tap on Install and select the SuperSU zip file that you copy to your phone in Step 1 above.
  5. After selecting one of the .zip files above, Swipe to Confirm Flash on the bottom of the screen to begin the flashing zip file.
  6. Once SuperSU is flashed, you’ll get Reboot System option, select it.

Tuesday, 26 December 2017

Guide | How to Root Android Sony Xperia XZ1 Using Magisk

Guide | How to Root Android Sony Xperia XZ1 Using Magisk.

Root Xperia XZ1. At this time we will show you how to Root Sony Xperia XZ1 device. The following root tutorial is sourced from N1ghtr08d as the senior member of the XDA discussion forum. here is a bit information about the device we will use for the root experiment. Sony Xperia XZ1 Released 2017, September. Comes with 5,2 Inch IPS LCD capacitive touchscreen, 16M colors. Powered by Octa-core (4x2.35 GHz Kryo & 4x1.9 GHz Kryo) CPU, Qualcomm MSM8998 Snapdragon 835 chipset, Adreno 540 GPU. Xperia XZ1 run on Android 8.0 (Oreo).

If you decide to root your Xperia XZ1 with this method, you will lose your DRM keys. As a result, you won’t be able to use first-party features like X-Reality or Track ID. To get root access on Xperia XZ1 you need to magisk and flash a modified version of TWRP and that you use a custom kernel.

Let's start this guide.
Root Android Sony Xperia XZ1

Prerequisite.

  1. Unlock Your Device Bootloader 
  2. Enable Developer option
  3. Enable ADB debugging.
  4. Download modpunk's port of TWRP. Here 
  5. Then, D0wnload aledoom's port of the Andro+ kernel. Here
  6. D0wnload Magisk-v14.5(1456).zip Here 
  7. D0wnload ADB Fastboot tool and Extract the ADB Fastboot Tool anywhere on your computer. eg. desktop.

Instructions.

Flash TWRP recovery.

  1. Connect the Xperia XZ1 to the computer.
  2. Then, Open the Extractor ADB and Fastboot folder and Open Command Window by pressing Shift Key + Right Mouse Click.
    open command window
    open command window
  3. Then, Reboot the Xperia XZ1 into Bootloader – Type the following command at the command prompt.
    • adb reboot bootloader
  4. Or you can use the 2nd method to boot your Sony Xperia XZ1 into bootloader.
    • Turn off the phone.
    • Then, press and hold the Volume Up and attach a USB Cable from your PC
    • it will boot into the bootloader. 
    • Then, the LED will be blue.
  5. Now your Xperia XZ1 will boot into bootloader.
  6. Copy all prerequisite files above (recovery and the boot image) into the ADB and fastboot folder.
  7. Then, type the following command to flash boot image and recovery.
    • fastboot flash recovery twrp-3.2.0-0-poplar-patchlevel-2017-11-05.img 
    • fastboot flash boot boot.img fastboot 
    • flash FOTAKernel boot.img
  8. This will take a time until the process is completed.
  9. Once the process is done, type the command to reboot your Xperia XZ1.
    • fastboot reboot.
  10. Now, Reboot the system and then power off the Xperia XZ1.
  11. Finish.

Install Magisk to Root device via TWRP.

  1. Copy latest magisk to the phone root directory.
  2. Then Power off your phone.
  3. Boot your phone into TWRP recovery. How to boot Sony Xperia XZ1 into TWRP recovery?
    • Press and hold the power button + the volume down button
    • Release the Power button when your phone vibrates once.
    • But, keep holding the volume down button until you see the TWRP splash screen.
  4. Once your phone enters the TWRP recovery screen,  It will ask you for your password to decrypt the data partition.
  5. You need to enter the PIN number or password you use on your phone lock screen.
  6. But, if you don't use any lock screen security then the password is: default_password
  7. From the TWRP main menu tap Install.
    TWRP Sony Xperia XZ1
    TWRP Sony Xperia XZ1
  8. Then, browse where you save magisk.
  9. Now, swap to start flashing magisk to your phone.
  10. Once TWRP successfully flashes magisk to your device, now select reboot to the system.
  11. Finish.

Saturday, 23 December 2017

How to Root & Flash TWRP HTC Desire 10 Lifestyle Android 6.0 Marshmallow.

How to Root & Flash TWRP HTC Desire 10 Lifestyle Android 6.0 Marshmallow.

Root HTC Desire 10 Lifestyle. Hy guys. the following guide will show you how to root and flash TWRP recovery HTC Desire 10 Lifestyle. So, if you need this information now, you can try to apply this guide to your HTC Desire 10 Lifestyle phone. You can find many solutions to all the problems when flashing TWRP  recovery through the source link

Step By Step Root HTC Desire 10 Lifestyle.

  1. Make sure your phone is HTC Desire 10 Lifestyle in order to follow this guide. Because this guide only applies to the HTC Desire 10 Lifestyle device.
  2. Make sure your HTC phone is bootloader unlocked. if not. you can open the following link, or read the guide here.
  3. Turn on OEM Unlock developer options menu, make sure OEM Unlock is turn on to get unlock token later.
  4. Then, D0wnload the TWRP Recovery for HTC Desire 10 Lifestyle.
    • Visit this link to d0wnload the TWRP.
  5. Reboot your phone into bootloader.
  6. Then, you need a switch to fastboot mode and use the command to boot the recovery
    • fastboot boot twrp-3.2.1-0-a56dj.img
  7. But, if you want to install TWRP as the main recovery please use the following command.
    • fastboot flash recovery twrp-3.2.1-0-a56dj.img
  8. Once TWRP successfully installed on HTC Desire 10 Lifestyle, now you can do everything on your phone. For example, root your phone.

Root HTC Desire 10 Lifestyle.

  1. If you have successfully installed TWRP recovery, now it's time to root your device.
  2. Copy SuperSU into an internal memory card.
  3. Boot your HTC Desire 10 Lifestyle into recovery mode.
  4. Now, flash or install SuperSU via TWRP recovery menu.

Monday, 18 December 2017

Guide | Hard Reset Lenovo K8 Note to Remove Forgotten Password or Unlock Pattern.

Guide | Hard Reset Lenovo K8 Note to Remove Forgotten Password or Unlock Pattern.

Hard Reset Lenovo K8 Note. If you have problems on Lenovo K8 note like forgot the password, or locked by the pattern. You can read the following guidelines to solve the problem. Because the following guidelines will explain how to do a hard reset on Lenovo K8 Note. By performing a hard reset, then all the settings that have been created by the user will be deleted. and restored to the default factory settings. So the password or pattern lock screen that has been created previously will also be deleted and set to clear.

Hard reset is also called factory reset or master reset. It will erase all data stored in the internal phone memory. We strongly recommend to backup all data before doing a hard reset. Hard reset method on Lenovo K8 notes is emphasized on the use of the external button. That is, we do not need to access the settings menu. 

If you are ready to perform a hard reset on Lenovo K8 note, now it's time to start.

How to Hard Reset Lenovo K8 Note?

  1. Power Off Lenovo K8 Note.
  2. Then, turn on it again by press and hold the following button simultaneously.
    • Power Button + Volume Up button
  3. Now, release all button when your phone asked to select boot mode.
  4. Now, select recovery and confirm it using the Power button.
  5. Then, you will see a Lenovo Logo comes up on your screen.
    Lenovo K8 Note Logo
    Lenovo K8 Note Logo
  6. Just wait for a second. Your screen will show green Android logo with no command.
    no command
    no command
  7. Now, press and hold the following button at the same time to enter Android system recovery.
    • Power Button + Volume UP + Volume Down
  8. Now, your phone enters Android recovery menu.
  9. From this menu, you can navigate all menu using volume button and confirm with power button.
  10. Now, highlight wipe data/factory reset and press power button
    wipe data / factory reset lenovo k8 note
    wipe data/factory reset Lenovo k8 note
  11. Then, scroll down and highlight yes ---- delete all user data.
  12. The system will start to erase all user data, once it completed back to the Android recovery main menu and highlight reboot system now. 
  13. Now, your phone will reboot, and the password or security pattern lock screen will be gone.

How to Root & Install TWRP Recovery Lenovo K8 Plus

How to Root & Install TWRP Recovery Lenovo K8 Plus.

Root Lenovo K8 Plus. The following guidelines will show you how to root and flash TWRP recovery Lenovo K8 Plus.  We made the following guidelines as simple as possible, to be understood by everyone. Even if you are a beginner in getting to know root. Many methods can be used for root Lenovo K8 Plus, but the following method has a minimum risk and guarantees worked. Ok, now we will start to root the phone released in 2017, September.

Make sure to backup all user data before root proceeding. This action will delete all user data stored in your phone memory. We will flash TWRP recovery for Lenovo K8 Plus with the recovery zip file.

Prerequisite.

  1. Download and extract ADB Fastboot tool. Here.
  2. Download TWRP Recovery 3.1.10 for Lenovo K8 Plus. Here
  3. Download Magisk-v13.5(1350).zip. Here
  4. Download the latest SuperSU.zip from Here.

Instruction Guide.

Flashing TWRP recovery.

  1. Rename TWRP Recovery 3.1.10 for Lenovo K8 Plus to twrp.img
  2. Then copy or move twrp.img to the extracted ADB & fastboot folder.
  3. Now, go to the ADB & fastboot extracted folder.
  4. Then, double-click MAF32.exe to open command prompt windows.
  5. Now turn your Lenovo K8 Plus into fastboot mode. How to turn on Lenovo K8 Plus into fastboot mode?
    • Turn Off your phone.
    • Once it completely powers off now turn it on.
    • You need to turn on by pressing the following button at the same time.
      • Power button + Volume Down 
    • Wait for 10-15 sec
    • Then release the volume button
    • Now, press volume button and select recovery.
    • Now, press power button and then it will display no command
    • Now press power  + Volume Up and release only Volume UP.button and now you are in recovery mode 
    • Then, select option reboot to reboot into bootloader
  6. Then, connect your phone to the computer via original USB cable.
  7. Back to the step no.4 above. (now you are at the command prompt windows)
  8. If you cannot turn on your phone into fastboot mode using the step 5. above. Try to use this command.
    • How to turn on Lenovo K8 Plus into fastboot mode using the fastboot command.
      • From the command prompt,  type the following command then press the enter button.
        • adb reboot bootloader
  9. Once your device successfully enters fastboot mode. Now type the following command at the command prompt.
    • fastboot devices
  10. Now type the following command to start flashing twrp.img to your phone.
    • fastboot flash recovery twrp.img
  11. Then type the following command to reboot your Lenovo K8 plus into TWRP recovery.
    • fastboot boot twrp.img
  12. Now, your phone will reboot into TWRP recovery.

Root Lenovo K8 Plus.

  1. Copy Magisk-v13.5(1350).zip to the SD card root directory.
  2. From step no. 12 above, tap install.
    flash twrp lenovo k8 plus
    flash twrp Lenovo k8 plus
  3. Then, select storage where you save Magisk-v13.5(1350).zip file.
  4. Once it found, tap the file.
  5. And now swap to confirm flash the zip file into Lenovo K8 Plus.
  6. Wait for the process until finished.

Saturday, 16 December 2017

Hard Reset OnePlus 5T to Unlock Security Pattern Lock Screen or Forgotten Password.

Hard Reset OnePlus 5T to Unlock Security Pattern Lock Screen or Forgotten Password.

Master Reset OnePlus 5T. The following guide will show you how to perform the hard reset or master reset on OnePlus 5T. hard reset on Android phone also calls with a factory reset. It will restore all user setting to default factory setting and wipes all user data. So, if you have any issue with lock screen the hard reset will help you to fix it. There are several methods to do a hard reset OnePlus 5T. First, you can use the software menu located on the settings menu. second, you can perform the hard reset using external phone button. generally, this button is on the side phone body. you can use one of these methods to perform a hard reset on OnePlus 5T, depending on the locked condition of your mobile phone.

Warning. Hard Reset OnePlus 5T will erase all of your personal data. guidebelajar not responsible for any damages. Perform a hard reset on your own responsibility only.

Hard Reset OnePlus 5T Guide (Hardware Button)

  1. Power off phone
  2. Backup everything stored in phone memory
  3. Turn on phone press and hold the following button at the same time.
    • Power button + volume down button.
    reset OnePlus 5T
    reset OnePlus 5T
  4. Release the volume down only when the OnePlus logo comes up, then immediately press it again.
  5. If your Oneplus 5T is locked by pattern lock, you must draw it to unlock. 
  6. Once it successfully approved, now your phone will enter recovery menu.
  7. From the recovery menu, tap English
    reset OnePlus 5T
    reset OnePlus 5T
  8. Then tap wipe data and cache
  9. Now, tap Erase everything (music, pics, etc)
  10. Then tap this cannot be undone, continue?
  11. Now, your Oneplus 5T will wipe everything to restore default factory settings.
  12. finish.

Hard Reset OnePlus 5T via Software Menu.

  1. Go to settings
  2. Then tap Backup&reset
  3. Now tap factory data reset.
  4. Tap System data
  5. Tap Reset Phone.
  6. Tap Erase everything

Friday, 15 December 2017

How to Root and Flash TWRP Recovery OnePlus 5T.

How to Root and Flash TWRP Recovery OnePlus 5T.

Root OnePlus 5T. This is official TWRP recovery for Android OnePlus 5T. So, if you need to root your OnePlus 5T. You will need to flash the current TWRP recovery into your device. If you need the information how to root Android OnePlus 5T and flashing TWRP recovery into this device, now you can follow this guide. This guide provides the root and flashing TWRP on Android OnePlus 5T device.

There are some requirements to root Android OnePlus 5T. Then what we need to do?
root oneplus 5t
root one plus 5t

Requirement.

  1. ADB and Fastboot already installed on the PC, If not follow this guide how to download and install ADB & fastboot on your PC.
    • How to install adb & fastboot on the computer?
      • Download the full Android SDK here
      • Then, Extract the zip file and place the android-sdk-windows folder on your computer.
      • Now, go to the platform-tools folder.
      • To confirm the ADB & fastboot working, you need to send a command from the command prompt.
    • How to open a command prompt to Run ADB & fastboot?
      • From the platform-tools folder, right click + shift 
      • Click Open command window here.
    • How to confirm ADB & fastboot is indeed working?
      • From the command prompt type the following command.
        • adb version
      • If it displays "Android Debug Bridge version x.x.xx" the ADB & fastboot is working.
  2. Unlock Bootloader OnePlus 5T. How to unlock bootloader OnePlus 5T ? see this guide.
  3. Download TWRP recovery for OnePlus 5T. (twrp-3.2.0-0-dumpling.img)  Here 
  4. Download the Latest SuperSU.zip file from here
  5. Enable USB debugging.
    • You can go to Settings > About phone > Tap on Build number 7 times. 
    • This will enable Developer options. 
    • Now go back to Settings > Developer options > Enable USB debugging
  6. Enable OEM Unlock
    • You can go to Settings > Developer options. 
    • Then enable the 'OEM Unlocking' option.

Installation Guide.

  1. Copy or move twrp-3.2.0-0-dumpling.img to the ADB folder or platform-tools folder
  2. Power off your OnePlus 5T
  3. Then, boot your OnePlus 5T into fastboot mode.
    • How to boot OnePlus 5T into fastboot mode?
      • Press and hold volume up + power at the same time.
      • Then The OnePlus 5T will display "fastboot" text indicating that it has successfully entered fastboot mode.
  4. Now, Plug the one plus 5T into your computer, then open a command prompt window from ADB folder and type the following commands.
    • fastboot devices
  5. Once the OnePlus 5T has been recognized by the command above. you can proceed to flash TWRP recovery (twrp-3.2.0-0-dumpling.img)
    • fastboot flash recovery twrp-3.2.0-0-dumpling.img
  6. Once the command above successfully executing, don't use the fastboot reboot command. Instead, disconnect your OnePlus 5T phone then Manually boot it into recovery.

Guide to ROOT OnePlus 5T.

  1. Copy SuperSU.zip file to your phone root directory.
  2. From step 6 above, reboot your Oneplus 5T into recovery. 
    • How to manually boot Oneplus 5T into recovery.
      • pressing the Volume Button for a couple of times.
      • till the recovery in red comes up on the top and then hit the power button to reboot.
    • How to boot OnePlus 5T with the command prompt.?
      • From the ADB and fastboot command prompt, type the following command.
      • fastboot boot recovery.img
  3. Once OnePlus 5T successfully boot into TWRP recovery and allow system modifications.
  4. Now, Swipe right and enable modifications.
  5. Then tap Install button.
  6. Now, you can navigate to Install and select SuperSU Beta to root OnePlus 5T.
  7. Once ready to flash Swipe to confirm the flash
  8. Now, reboot the system.
Attention, the first boot after wiping the OnePlus 5T may take longer than usual.

How to Unlock Bootloader Android OnePlus 5T

How to Unlock Bootloader Android OnePlus 5T.

Unlock Bootloader OnePlus 5T. The following guide will show you how to Unlock the bootloader OnePlus 5T. Unlock bootloader is needed when you want to install a custom recovery or custom ROM. like other android phones, Oneplus 5T is also present in the locked bootloader. So, if you want to flash any custom recovery, you need to unlock it. And now, you can do it by following this guide. Oneplus 5T released in November 2017. This device comes with 6.01 inches, Optic AMOLED capacitive touchscreen, 16M colors, and powered by Octa-core (4x2.45 GHz Kryo & 4x1.9 GHz Kryo) CPU.

Before Unlocking the bootloader OnePlus 5T you need to do the following task.

Prerequisite.

  1. Install ADB and fastboot on the computer.
    • How to install adb & fastboot on the computer?
      • Download the full Android SDK here
      • Then, Extract the zip file and place the android-sdk-windows folder on your computer.
      • Now, go to the platform-tools folder.
      • To confirm the ADB & fastboot working, you need to send a command from the command prompt.
    • How to open a command prompt to Run ADB & fastboot?
      • From the platform-tools folder, right click + shift 
      • Click Open command window here.
    • How to confirm ADB & fastboot is indeed working?
      • From the command prompt type the following command.
        • adb version
      • If it displays "Android Debug Bridge version x.x.xx" the ADB & fastboot is working
  2. Android OnePlus 5T device.

How to Unlock Bootloader OnePlus 5T?

  1. Warning, unlocking the bootloader will completely wipe all data from the OnePlus 5T device.
  2. Power off phone.
  3. Then, boot your OnePlus 5T into fastboot mode.
    • How to boot OnePlus 5T into fastboot mode?
      • Press and hold volume up + power at the same time.
      • Then The OnePlus 5T will display "fastboot" text indicating that it has successfully entered fastboot mode.
  4. Now, Plug the one plus 5T into your computer, then open a command prompt window from ADB folder and type the following commands.
    • fastboot devices
  5. Once the OnePlus 5T has been recognized by the command above. you can proceed to unlock the bootloader your phone by sending the following command.
    • fastboot oem unlock
  6. Once the command above successfully executing, then run the following command to reboot your OnePlus 5T device.
    • fastboot reboot
  7. Now, your OnePlus 5T will reboot.

Monday, 11 December 2017

Guide | How to Root Samsung Galaxy J5 2017 SM-J530F Run Android 7.0 Nougat.

Guide | How to root Samsung Galaxy J5 2017 SM-J530F Run Android 7.0 Nougat.

Root Samsung Galaxy J5 2017. The following guide will show you how to root and install TWRP recovery on Samsung Galaxy J5 2017 SM-J530F Using ODIN software. So, if you need this information, you can read this guide carefully in order to avoid your Samsung Galaxy J5 2017 brick or other risks. So, you must use your own risk and guidebelajar not responsible for bricking your phone. Rooting your Samsung J5 2017 with the following method will erase or wipe all data stored in the phone memory. We highly recommend to backup everything before perform it.

Now, we will root Samsung Galaxy J5 2017. This device released in June 2017. Comes with 5.2 inches, Super AMOLED capacitive touchscreen, 16M colors. Powered by Octa-core 1.6 GHz Cortex-A53 CPU, Exynos 7870 Octa chipset, Mali-T830 MP1 GPU, also supported by 3 GB of RAM. Samsung Galaxy J5 2017 has 13 MP on both second and primary camera. With Non-removable Li-Ion 3000 mAh battery. 

Prerequisite rooting and Installing TWRP Recovery on Samsung Galaxy J5 2017.

  1. Make sure your device is Samsung Galaxy J5 2017 to follow this guide.
  2. Then, you need to enable developer option your phone.
    • Settings -> About device
    • Then Tap 7 times on Build number to enable Developer options.
  3. Then, you need to Enable OEM to unlock and USB debugging options.
  4. Download the latest ODIN software. Here 
  5. Then, D0wnload and Install Samsung Mobile Phone Drivers: Here 
  6. Now you need to d0wnload  “twrp_3.1.1-1_j730gm_25817" Here
    • This is Unofficial release -TWRP recovery.
  7. D0wnload SuperSU HereThen copy to root of SD Card

Installation Guide.

How to Install TWRP recovery Samsung Galaxy J5 17.

  1. Or, you can continue with the following guide.
  2. Once all prerequisite above met, now boot your phone into Download Mode.

    • How to enter download mode Samsung Galaxy J5 2017?
      • Power Off phone
      • Press and hold the following button
        • Volume Down + Home Button + Power Button
  3. Once the warning screen comes up, press the Volume Up to continue. While connecting Samsung Galaxy J5 2017 to the computer.
  4. Now, go to the computer and run Odin software.

    • uncheck auto reboot on the options tab.
    • then click AP button to browse twrp_3.1.1-1_j730gm_25817
    • Once it loaded, you need to click the start button.

  5. Just wait for flashing twrp, until ODIN says PASS with the green button.

How to Enter TWRP recovery Samsung Galaxy J5 2017.

Once TWRP recovery successfully installed on your phone, now you can boot or enter your Samsung Galaxy J5 2017 into TWRP recovery with the following method.
  1. Power off Samsung Galaxy J5 2017.
  2. Then, power On again by press and hold the following button simultaneously.
    • Volume Down + Home Button + Power Button.
  3. Once Samsung Galaxy J5 2017 logo comes up, immediately press the Volume Up button.
  4. Now, release all button when your phone enters the TWRP main menu.

Root Samsung Galaxy J5 2017.

  1. Copy 'SuperSU.zip' to the external SD Card.
  2. Reboot Samsung J5 2017 into TWRP recovery.
  3. Flash SuperSu via TWRP recovery
    • Tap Install button from the TWRP main menu.
    • Then browse where you copy the SuperSU.zip file
    • Once it found, swap to confirm flash.
  4. Just wiat a minute beore everything ready.

Sunday, 10 December 2017

Flash Stock Firmware 10F LG G6 H870 KDZ Method Using LGUP & Uppercut.

Flash Stock Firmware 10F LG G6 H870 KDZ Method Using LGUP & Uppercut.

Flash Stock ROM 10F LG G6 H870. The following guide will explain how to solve boot loop or bricked issue on Android LG G6. Or you can also use this guide to upgrade to the current Android version. This is 10F stock firmware, which 10f is the second official LG Android 7.0 Nougat update for open UE devices. To flash the 10f stock firmware, we need the LGUP and Uppercut.

We know that LGUP tool is a new flashing tool to flash kdz/tot/bin stock ROM format into the LG smartphone device. LGUP work only on Windows Operating System. But, not all LG devices are supported by LGUP flash tool. Therefore, we need Uppercut. the Uppercut allows LGUP to instantly work with a ton of different LG phone models. So you do not need to be confused to find specific model files.

To flash a stock ROM LG G6 using LGUP tool, simply install LGUP tool. Then double-click the uppercut.exe and LGUP will open and detect your device automatically. For more detail information you can visit the forum-xda-developer here

So, what do we need to flash stock ROM 10f to LG G6? The following are the requirements.

Requirement.

  1. A computer with Windows OS based.
  2. LG's Windows USB drivers. Here
  3. LGUP tool Here
  4. Download Uppercut from Here
  5. Download Stock ROM 10f for LG G6.
    • H87010f_00_OPEN_EU_OP_0417.kdz Here 

Instruction How to flash LG G6.

  1. Make sure all required files above are successfully downloaded on your computer. Then, do the following step.
    • Install LG USB Driver
    • Install the latest LG UP software
    • Extract or Unzip Uppercut.zip
  2. Then, double-click the uppercut.exe before running LGUP. Uppercut.exe requires LGUP 1.14 (not 1.11) installed on the computer.
  3. uppercut LGUP
    uppercut LGUP
  4. Now, put your LG G6 Smartphone into download mode, you can manually do it by ;
  5. https://goo.gl/Y5SGeF
    • Turn Off your LG G6 Smartphone device.
    • Then press and hold Volume UP button while connecting your LG G6 Smartphone to the computer using the USB cable.
  6. Then run LGUP tool.
  7. Wait a moment until LGUP detect and recognize your LG smartphone. This will install a necessary USB Drivers for your device.
  8. Now, your LGUP should show up on your computer screen.
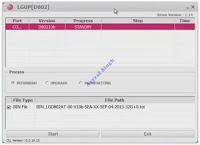
  9. Flash LG G6 H870 using LGUP
    Flash LG G6 H870 using LGUP
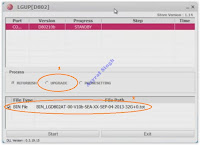
  10. From LG UP screen above, go to process tab and select Upgrade.
  11. Then click on BIN file under file type.
  12. Flash LG G6 H870 using LGUP
    Flash LG G6 H870 using LGUP
  13. Then click the button on the right side of bin file shown in the picture below.
  14. Flash LG G6 H870 using LGUP
    Flash LG G6 H870 using LGUP
  15. This action will browse your kdz/tot file you just download.
  16. Once your kdz/tot file already in the LGUP software, now click Start.
  17. Flash LG G6 H870 using LGUP
    Flash LG G6 H870 using LGUP
  18. Now, LGUP will start flashing process, this is indicated on the progress bar.
  19. Flash LG G6 H870 using LGUP
    Flash LG G6 H870 using LGUP
  20. Just wait until the step on progress bar shows 100% complete. Once it completed LG G6 will automatically reboot
  21. Now, you can unplug your LG G6 device from the computer.

Saturday, 9 December 2017

How to Perform Factory Data Reset | Hard Reset LG Q6 (2017)

How to Perform Factory Data Reset | Hard Reset LG Q6 (2017).

Master Reset LG Q6. If the LG Q6 screen is currently locked due forgot a password, PIN, or pattern lock. You can unlock it using the following method. This method will show you how to perform hard reset or factory reset on LG Q6. Resetting your LG device will erase all of the user data. This means you can remove the password or PIN ever set on this device. Therefore, you need to backup everything stored in phone internal memory (file, data, downloaded apps, etc).

Besides you can unlock LG Q6 screen, you can also use the hard reset to fix the following things, Frozen screen, unresponsive touchscreen, device become slowly when running any apps. etc. By performing a hard reset, you will restore all of the settings ever made by the user back to the factory settings. You will lose your personal data, Google account previously synced with LG Q6, and other installed Apps. We strongly recommend to backup all of the data before performing a hard reset.

The following guide only for LG Q6 device. However this guide work on most of LG phone. Here are the LG Q6 specifications.
  • LG Q6 released in 2017, August.
  • Comes with 5.5 Inches IPS LCD capacitive touchscreen, 16M colors.
  • Powered by;
    • Octa-core 1.4 GHz Cortex-A53 CPU.
    • Qualcomm MSM8940 Snapdragon 435 chipset
    • Adreno 505 GPU.
  • Camera;
    • 5 MP of secondary camera
    • 13 MP of primary camera.
  • Battery, Non-removable Li-Po 3000 mAh battery.

Suggestion before performing a hard reset. So, your LG Q6 is not locked by FRP (factory Reset Protection).

  • If your LG Q6 run on at least Android 5.1 lollipop, you need to know the GoogleTM email address and password before executing the hard reset on your device.
  • Remove google account from your LG Q6 device (go to settings - accounts - Google - select the google account you want to remove)
Unlock Forgotten Password, PIN, Pattern Lock Screen Without Losing data.

Hard Reset Guide.

  1. Once again we remind you, make a backup all of the personal data while still possible.
  2. Make sure you have enough battery capacity to running the hard reset on your device. 
  3. Now, Power off LG Q6 (this method will perform the hard reset via hardware key/button)
  4. Then, Power On again by press and hold the following button at the same time.
    • Volume down + Power button.
  5. Release the power button only when the LG logo comes up on your screen, then immediately press it again.
  6. LG Q6 Logo
    LG Q6 Logo
  7. Now, release all button when the factory data reset menu comes up on your screen.
    LG Q6 factory data reset
    LG Q6 factory data reset
  8. From the following screen, you can navigate the menu using volume button (Volume Up or Volume down), and use the power button to confirm.
  9. Now, highlight yes using volume button. And confirm it using the Power button.
  10. Then highlight Yes again. And start de to delete all user data and reset all settings.
  11. Now, your device will perform the hard reset process.
  12. Once it was done, LG Q6 will automatically reboot the system.
  13. Finish.

Thursday, 7 December 2017

Guide | How to Root Android LG G6 H870 via TWRP Recovery

Guide | How to Root Android LG G6 H870 via TWRP Recovery.

Root LG G6 via TWRP. The following guide will show you step-by-step how to root your LG G6 device. In the following guidelines, we use TWRP recovery to root LG G6. Actually, there are many methods to root Android device. You can find many tools available in the play store to root an Android phone. But, sometimes the tool works only on some Android brands only. We need a special treatment to make root on LG G6. So, the device is really getting the root access. 

Usually, the process is fairly simple and won’t take a lot of time to complete. Here you are required to understand how to flash a recovery. And, we choose the TWRP as the recovery which we will install on the phone.

If you are still hesitant to root LG G6, we will show some benefit if you root your device.
  • You can unlock hidden features on your LG G6.
  • You can install incompatibles app that comes from outside of Play store.
  • You can tweak and increase CPU speed
  • You can save the battery life.
  • You can block and remove ads from free apps.
  • You can remove or uninstall crapware that comes preinstalled. Which this is annoying, battery-draining, space-wasting applications.
Besides, you will get a benefit from a root of LG G6. You may have disadvantage root your device.
  • Your LG G6 may get bricked or damaged.
  • You may be voiding phone's warranty.
Ok, if you already understand the benefits and disadvantages of root your phone. and want to proceed with this guide, then you need to follow the next step of this guide.

Prerequisite.

  1. Make sure your device is LG G6 H870, you can check it by going to Settings - About phone - Model number.
  2. Make sure TWRP recovery 3.0.1 already installed on LG G6. Visit this guide on how to install TWRP recovery on LG G6. 
  3. Download no-verity-opt-encrypt-5.1 Here
  4. Download SR4-SuperSU-v2.78-SR4-20161115184928.zip Here 

Installation Guide.

  1. Copy or move no-verity-opt-encrypt-5.1 and SR4-SuperSU-v2.78-SR4-20161115184928.zip to the SD card root directory.
  2. Make sure your phone battery has enough power capacity.
  3. Power off LG G6.
  4. Then, power on it to the TWRP recovery mode by press and hold the following button at the same time.
    • Volume Down + Power Button.
  5. Release the power button only when the LG logo comes up, then immediately press it again.
  6. Now, you can release all button if TWRP recovery main menu comes up.
    root LG G6
    root LG G6
  7. From this menu, tap Install button.
  8. Now, browse the zip file already copying at the step no. 1 above,
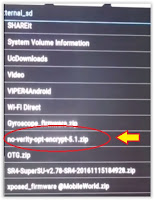
  9. Then tap no-verity-opt-encrypt-5.1.zip.
    root LG G6
    root LG G6
  10. Then, swap to confirm flash.
  11. Once it was done, you can tap SR4-SuperSU-v2.78-SR4-20161115184928.zip and swap to confirm flash again. It will flash SuperSu to root your LG G6 device.
  12. Once it was done, now perform reset data. Tap Wipe button to start it.
  13. Then swap to confirm factory reset.
  14. At the end of this process, you can tap Reboot button. It will reboot your device into the system and run your phone normally.
  15. Finish.

Wednesday, 6 December 2017

Guide | Flash Stock ROM LG G6 - (LG-US997 15A ROM) Via TWRP Recovery.

Guide | Flash Stock ROM LG G6 - (LG-US997 15A ROM) Via TWRP Recovery.

Flash Stock ROM LG G6 US997. This is an easy method to flash Stock ROM on LG G6 US997. We use the ZIP file to be able to flash through TWRP recovery. This ZIP file is created from the original KDZ and changed to the boot.img. This guide is written from the following xda threads. So, if you still confused how to apply this guide you can directly go to the source. Flashing stock ROM with the following made only work on the phone which can not get OTA's update because they have custom recovery/root /custom ROM installed.

There are many reasons why people install a custom ROM on their LG G6. Usually, they want to customize and improve the phone performance. The problems arise after they using custom ROM installed on the LG G6. For example.
  • The custom ROM has many bugs and unstable.
  • There are many features doesn't work
  • The custom ROM having an issue with the hardware configuration.
  • By installing custom ROM will void a phone warranty.
To resolve the issue above, simply flash your device with stock ROM and you will get back to the first time you bought this phone.

Stock ROM features.

  1. Stock build made from official KDZ
  2. Stock Build.prop
  3. Unrooted
  4. Boot.img modified to keep TWRP
  5. Remove dm-verity
  6. Remove forceencrypt

Prerequisite.

  1. Make sure your device is Android LG G6 US997
  2. You need to Unlock Bootloader LG G6 US997 -- visit this guide how to do it
  3. Make sure TWRP is installed on your LG G6 device. -- Visit this guide how to install TWRP recovery on LG G6
  4. You need to get root access on LG G6
  5. Download LG G6 Stock ROM -- US997_15A_(TWRP).zip

Installation Guide.

  1. Make sure all the prerequisite above is done.
  2. Backup everything before proceeding the flashing process.
  3. Make sure you have 80% of battery capacity.
  4. Copy stock ROM or Zip file to the SD card root directory.
  5. Now, reboot LG G6 to the TWRP recovery using the following button/key at the same time.
    • Volume UP + Power Button
  6. Once your LG G6 enter TWRP recovery main menu. You can do the following task.
    • Backup Dalvik, ART, Cache,
    • Wipe System & Data
    • Then, reboot again.
  7. Now, back to the TWRP main menu again. and tap Install button.
  8. Then, browse your custom ROM US997_15A_(TWRP).zip from the internal memory root directory.
  9. Then, Swap to confirm flash.
  10. Just wait for a flashing process,
  11. Once it was done, you can tap reboot to reboot your device into the system.
  12. Finish.

Tuesday, 5 December 2017

Guide | How to Officially Unlock Bootloader LG G6 H870 and US997.

Guide | How to Officially Unlock Bootloader LG G6 H870 and US997.

Unlock Bootloader LG G6. Every Android device has a bootloader. Which a bootloader is a piece of software that runs every time the phone is boot up. The bootloader will tell the Android system to load which program to load to make sure your phone runs well. By default, the bootloader is locked by the phone manufacturer. This is because the bootloader contains an extra layer of security that checks to make sure that it only loads an Android OS that passes its approval process. That mean's if the bootloader is locked you cannot flash or install your own ROM or any recovery like TWRP or CWM.

So, if you need the information about how to unlock the bootloader on LG G6. You can read and follow this guide. Now, the LG G6 H870 for the European market and the USA carrier-free US997 can now be officially unlocked through LG's developer unlock program. You must be careful to unlock the bootloader to avoid your LG G6 bricked or evenly totally dead.

Important to note, unlock bootloader wipes all data on your phone and it cannot be undone. Therefore, you need to backup everything before unlocking the bootloader on your LG G6 phone. Unlock bootloader also makes your phone has a security vulnerability. Unauthorized phone user could reboot your LG G6 into its bootloader and then boot your custom recovery environment. Once LG G6 enter recovery mode they could use the adb command to access all data on your LG G6. This method will bypass PIN, password, or other security used to protect your LG G6.

Ok, if you are still interested to unlock the bootloader on LG G6 device. Then you can start the following guide. 

Prerequisite.

  1. This guide totally works on LG G6 H870 or US997 device.
  2. Enable USB Debugging, Here
  3. Enable the OEM unlock. 
  4. D0wnload ADB and fastboot on your computer.
  5. LG G6 IMEI number. This is 15 digit code can be found on a printed sticker on the back phone cover. or, visit this guide to know more how to find IMEI or MEID 
  6. LG Device ID. visit this guide on how to to get and view Device ID LG phone.
  7. Visit the LG Developer website to get the unlock key. Here
    • You need to sign up for free (if you don't have an account yet)
    • Then, click the Starting Unlocking the Bootloader button.

Unlocking Guide.

  1. Once you have successfully Sign-in into LG developer website, now you need to provide the following information.
    • Nickname
    • Email
    • Phone type 
    • IMEI or MEID
    • Device ID.
      Unlock Bootloader LG
      Unlock Bootloader LG 
  2. Once all form already filled all, then you need to click confirm button.
  3. Then, click the Agree button at the legal term window
  4. Please wait for a while, then you can continue to check the Email inbox. This Email contains unlock.bin file attachment.
  5. Now, you can download this file.
  6. Copy the unlock.bin file to the ADB and fastboot folder.
  7. Then, connect your LG G6 to the computer with USB cable.
  8. Then, from the ADB and fastboot folder you need to open a command prompt. How to do it?
    •  right click and hold the shift button, and click open command window here or Open with Powershell
    • open command in adb fastboot
      open command in adb fastboot
  9. Now, you need to verify your LG G6 H870 connected to the computer or not by type the following command.
    • adb device
  10.  Then you need to reboot your LG G6 H870 into bootloader using this command and press enter
    • adb reboot bootloader

  11. Just wait a minute, your device will automatically shut down and reboot into bootloader mode.
  12. Then, type the following command to proceed to unlock the bootloader and flash unlock.bin file into your phone.

    • fastboot flash unlock unlock.bin

  13. Then type the following command to get the unlock status on your device.

    • fastboot getvar unlocked


  14. If you have successfully locked your device, the command prompt should return with the unlock status = Yes
  15. Done. 

LG G6 H870 Hard Reset | Factory Data Reset

LG G6 H870 Hard Reset | Factory Data Reset.

LG G6 H870 Master Reset. How to perform a hard reset or factory reset if you forgot the password, PIN, or security pattern lock screen on LG G6 H870 phone? Just follow this guide to solve your problem. The following guide will show you how to unlock and remove the forgotten pattern lock screen, or phone password. Other than that, you can use the hard reset to help fix a blank or frozen screen, crashing apps or freezing, unresponsive keypad/touchscreen, can't hear the phone voice, can't make or receive calls, and the device becomes slow in running the application.

Hard reset is known as master reset or factory reset, it will restore all user setting to default factory setting. And delete everything on the internal phone memory. Perform a hard reset or factory data reset only if absolutely necessary. A hard reset removes all data including.
  • Media File (Video, music, document, image, picture, etc)
  • Downloaded and installed Apps.
  • Synced GoogleTM account
  • System and App data.
  • App settings.
The hard reset method we will show you is using the hardware button. Usually, this button located on the back LG G6 phone cover. We use this method assuming cannot access the phone menu. But, if the phone is responsive and can be powered on, you can use the other method which will be explained in the 2nd method below.

If your device supports the FRP (factory reset protection) feature running on a device with at least Android 5.1 lollipop, you need to provide Google account sign-in previously synced with your phone during initial setup. To avoid your phone locked by FRP protection after performing the hard reset, you need to review the following before attempting to perform this factory reset.
  • It's very important to know the GoogleTM email address and password before proceeding the hard reset.
  • Or, remove google account from your LG G6 device (go to settings - accounts - Google - select the google account you want to remove)
Unlock Forgotten Password, PIN, Pattern Lock Screen Without Losing data.

1st Method - Hard Reset LG G6 via Hardware Button.

  1. Make sure to backup everything if still possible to access your phone.
  2. Make sure you have 80% battery capacity to continue the hard reset process, this is meant to keep the phone remains ON during the hard reset process.
  3. Power Off LG G6
  4. Once it completely powers off, then you need to power On again by press and hold the following button/key.
    • Power Button + Volume Down Button.
      LG G6 H870 hard reset
      LG G6 H870 hard reset
  5. Then, release the power button only when the LG logo displayed on the screen. Then immediately press it again.
  6. Now, you will enter factory data reset the main menu.
    LG G6 H870 hard reset
    LG G6 H870 hard reset
  7. At this menu, you can use the volume button (volume down or volume up) to highlight. and use the power button to confirm.
  8. Now, highlight Yes using volume down button, and press the power button to confirm.
  9. At the next screen, you need to repeat step no. 8.
  10. Once it confirmed, the hard reset process will begin.
  11. You will see a white circle in the middle of the screen indicating the hard reset process is running.
  12. Now, your LG G6 will reboot automatically.
  13. Finish.

2nd Method - Hard Reset LG G6  via Menu.

You can use the second method if the phone is still responsive and can be powered ON.

  1. Go to Settings.
  2. Select Backup and reset
  3. Tap Factory data reset 
  4. Then confirm.
  5. Now, all data will be deleted.