How to Flash Firmware Samsung Galaxy J7 Pro With ODIN.
Flash Firmware Samsung Galaxy J7 Pro. Flashing is the process of installing a new firmware into an Android mobile device. During the process of flashing all data stored in memory will be permanently deleted. Always back up data before the flashing process, so that important data is not lost. The following guide will explain in detail how to flash stock ROM or firmware into the Samsung Galaxy J7 pro. Flashing firmware can be used to solve the following problems; First, fix a boot loop phone. Second, Android phones start running slowly and lack storage Memory. Third, flashing an Android phone can be used to downgrade or upgrade the current firmware, etc.
This flashing guide will be applied to the Samsung Galaxy J7 pro. This device was launched on the market in July 2017. with 5.5 inches Super AMOLED capacitive touchscreen, 16M colors display. And powered by Octa-core 1.6 GHz Cortex-A53, and running on Android 7.0 (Nougat), planned upgrade to Android 8.0 (Oreo).
Ok, now we continue step by step the process of flashing the firmware on the Samsung Galaxy J7 Pro using ODIN.
Prerequisite.
- Make sure the battery is charged to avoid the system from shutting down. although during the flashing process the cellphone is charged via USB cable.
- Always backup all data before the flashing process starts.
- we recommend installing the USB driver on the computer, so that the connection between the cell phone and PC runs smoothly, download the USB driver from the following page.
- Then, download the ODIN software tool which is the main tool for flashing on Samsung Android phones. ODIN can you get from the following page.
- Now, download the fresh firmware for Samsung Galaxy J7 Pro. You can download the firmware from the following address.
- Samsung Galaxy J7 Pro SM-J730G
- Samsung Galaxy J7 Pro SM-J730GM
- Samsung Galaxy J7 Pro SM-J730F
- scroll down page description and find Galaxy J4 firmware.
Load Firmware into ODIN.
- Make sure the device you are using is Samsung Galaxy J7 Pro, because of an available firmware on prerequisite above only for the current device.
- Now, Extract ODIN software in certain folders that are easy to find. e.g (desktop)
- Then, Unzip the Samsung J7 Stock ROM or Firmware.
- To start flashing, your device must be turned off, so turn off your device now.
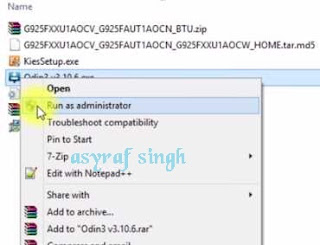
- Then, go to the ODIN folder and run the ODIN.exe application by right-clicking choose run as administrator.
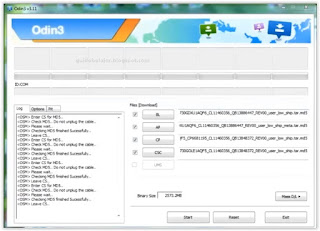
- Once the application window is open, now you can click the following button at the ODIN application windows, and navigate to the *.tar or *.tar.md5 firmware file to load it into ODIN window.
- Make sure all firmware already inserted into ODIN windows.
 |
| launch ODIN flash tool |
Enter Samsung Galaxy J7 Pro Into Download Mode.
- Make sure your cell phone is powered off.
- How to enter Samsung Galaxy J7 Pro into download mode?. You can press and hold the following button simultaneously
- Volume Down + Power Button + Home button.
- Release all button when your phone showed this image on the screen.
- To continue entering download mode press the volume UP button.
- To cancel entering download mode and restart the phone press the volume down button.
- More instructions, see this page.
 |
| download mode Samsung J7 Pro |
Start Flashing Samsung Galaxy J7 Pro.
- Connect your phone to the computer via USB cable.
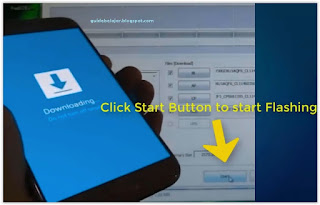
- Make sure your Samsung phone screen shows downloading.
- Now return to the ODIN application window, then click the start button to start the flash process.
flash Samsung J7 Pro Via ODIN - Wait a while until the ODIN window displays a green PASS. this means the flash process is complete, and the Samsung mobile phone will automatically reboot.
- After the handphone boots and is ready to be used again, now the cell phone is in the factory's initial settings. Therefore, you have to do the initial settings like when you first time bought it.


No comments:
Post a Comment